Anyway, in today's lesson we will discuss foot pegs and their related support system. If you were to ever do a study on foot pegs (or rear-sets as they're called on racing/sport bikes) you would see dozens of different designs. Walk into your local motorcycle dealership and take a look sometime. The sport bikes have their designs, the cruiser guys have theirs, and the motocross/offroad folks have theirs. They all do the same thing... which is provide a place for your feet, but they all seem to do it in different ways.
Now take that same study, and apply it to bikes throughout history. How many ways could there possibly be to design perches to put your feet? You'll see everything from bicycle pedals on cranks (which also function as a means to start the bike...) to long, wide platforms that would fit your whole size 10 boot!
I guess unfortunately for me, the old board track racers that I'm using as inspiration for my project all had the crank and pedal arrangement. So that leaves me with my own imagination on how to design my perfect arrangement.
If you've been following this build, you will recall that I am trying to combine the antique style of an old board track bike with a modern sport/race machine. My problem at times, is that there are tons of modern, cool, race-type parts available. Although I like many of these parts... they would stick out like a sore thumb on my bike.
For example:
These pics are just a couple I found, but if you want to put aftermarket rearsets on your sport/race bike, here are some for you to choose from. The ability to adjust every possible nuance seems to be paramount...


From a geeky perspective, these parts are not only like BLING for your bike, they're also sexy to look at.
However...
These parts would look so out of place on my bike. There are "simpler" designs that cater to the Cafe Racer guys, but those too look like you just slapped on some parts that don't really fit the bike.
So, again it's back to the drawing board for me.
here's what I came up with:
 |
| Shift side |
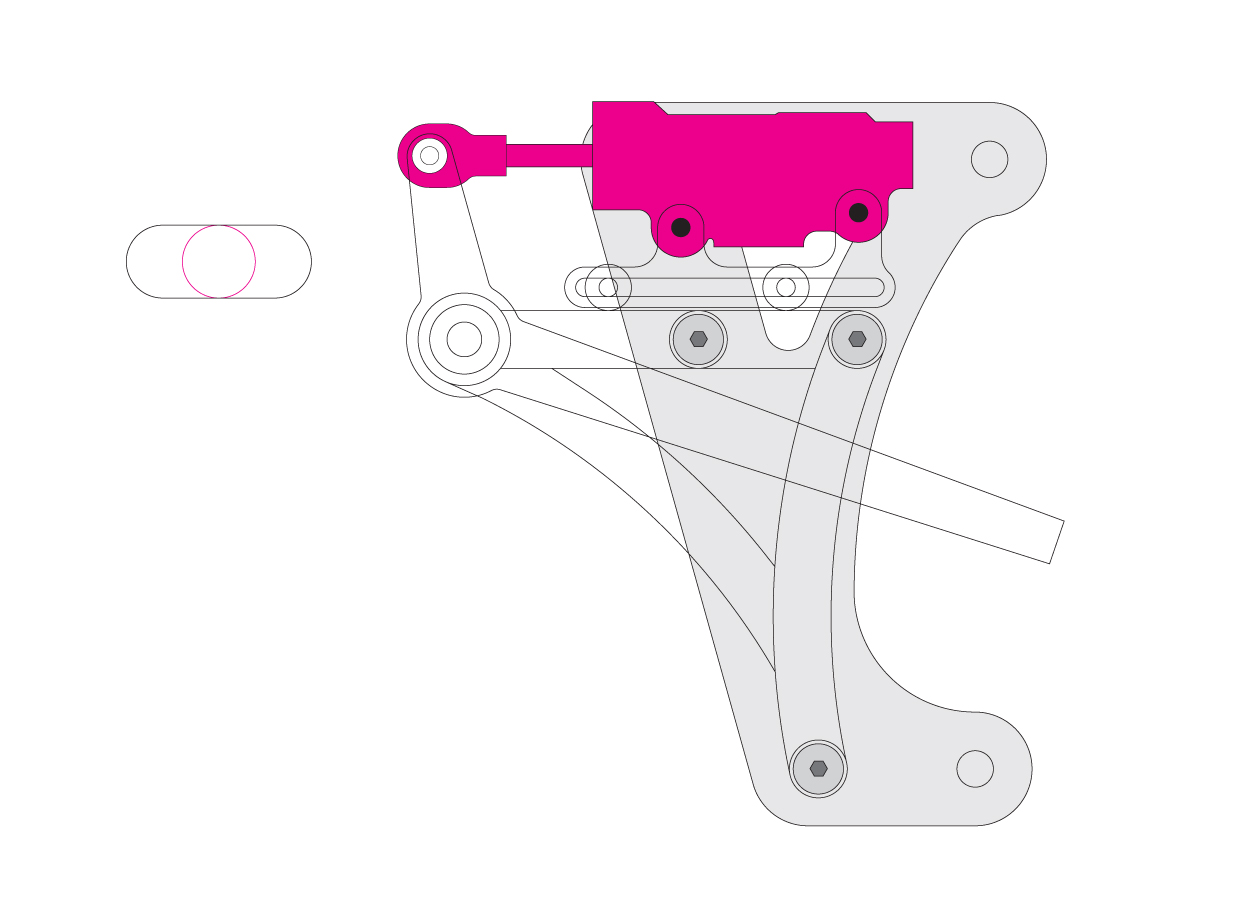 |
| Brake side |
Starting with the "shift side", I love mechanical movement. Seeing the parts move is exciting for me. So, I wanted to incorporate some linkage as a means to shift the bike. In fact, before the "cable" was invented (throttle cable, brake cable, etc) motorcycles used solid rods connected by u-joints and clevises to adjust the throttle opening, engine timing, etc! It's pretty amazing to see how those old bikes worked. So, that was my inspiration behind the linkage rods.
On the brake side, not many motorcycles utilize the rear brake master cylinder horizontally above the foot peg, so I figured that I'd go that route. It's a direct connection to the brake lever, and since I'm going to use SOLID stainless brake lines (like on a car) I needed a means to "adjust" the line length when I move the rear wheel back to tighten the chain... so the sliding master cylinder mount was designed. The rear wheel, brake line and master cylinder can all be moved as a unit. None of the "Z-bend" in the brake line type of adjusting on this bike!
I haven't finished the brackets or foot pegs yet, but here are some "in progress" shots machining the various fittings, bearing surfaces, etc. The drawings are what the final pieces will look like, but here they are in the state they are currently. (don't give me a hard time about all the metal chips in my lathe cabinet!)


Thanks for looking!
Until next time...
No comments:
Post a Comment