So, to recap really briefly:
I got this cheap bike as a starting point to make a custom board track-styled motorcycle
The first goal was to make the engine run reliably, and possibly add a little power.
The second goal was to purchase some gas welding equipment, and actually learn to USE it!
And here is 9 months worth of welding practice
I think my favorite practice piece is the v-shaped piece in the front. I used to have a Cervelo P2k triathlon bike with some aero bars on it, and I always liked those bars. When I got my "practice kit" of steel pieces, there was some aero tubing in it so I thought instead of just making anything out of it, I'd try to reproduce the general shape of the bars. After cutting, fitting, and welding, I put an abrasive/polishing disk in my drill press at a high speed and shined up the "bars". Here's a close-up
So, I am by no means a journeyman welder, but my skills have progressed to the point of me "taking off the training wheels" so to speak. I believe I am ready to start on the real stuff. It's MY butt that is going to be on this thing (with no suspension remember...), so believe me when I say that I am confident my welds will be strong enough!
I've ordered all the aluminum and steel that I'll need for the front triangle of the frame. That should arrive this week! I'm really excited to get started on it. I also found someone locally who has a CNC plasma cutter. He's the uncle of someone I work with, and because of that hook-up, he's only charging me $8 per part! For those who don't know, that's a screamin' deal.
Stay tuned... the next entry should have some engine mount plates made (kind of like the old Harley "Keystone" board track frame design) and possibly the "seat tube" section of the frame.
I can't wait until this thing is a roller!
Sunday, September 11, 2011
Merry Early Christmas!
As posted in my last entry, I made a quick mention of a drill press... Well, being that I am primarily welding tubing together to make this motorcycle frame, I needed a way to miter (fish-mouth) the tubing ends so I could fit them properly. So, one of the ways is to use a drill press and a hole-saw. I needed to find a drill press that would slow down enough to cut steel. I found a few that would fit the bill, but they were not available locally...
So, instead of being able to plunk down some cash for a new tool, I also had to consider shipping (on a tool that weighs almost 200lbs.) and find a location for the 18-wheeler to deliver to... And I haven't even mentioned getting if OFF the truck. Drivers aren't allowed to remove it (unless you pay another fee) So, if I wanted one of these "out of state" tools, I'd have to basically double the price to get it to my... work. An 18 wheeler wouldn't make it to my house.
I guess that's one of the things that I miss about living in the Chicago 'burbs... I could pretty much drive 20 miles in any direction and get anything in the world. Asheville, NC is a little different. Anyway... I digress.
So, I decided the Porter-Cable Drill Press from Lowes would fit the bill the best. Plus, I had a 20% off coupon for Harbor Freight that Lowes HONORED!!! You know how "they" say that it never hurts to ask? -Well, it doesn't!
Gracing the table of the drill press is a compound-slide vise. I don't plan on doing any milling on my drill press, but it sure cuts down on positioning and re-positioning of the vise! So far, I really like the setup.
So, this year, Santa (Deb) came a little early... Come to think of it, he (she) came early last year too. Last year was the lathe.
Slowly, but surely, the "shop" is coming along.
Saturday, August 6, 2011
Still practicing...
So, another blog post about welding.
Sorry if it's a little boring to watch, but it's all I've been doing lately. I ordered that box of 4130 cut offs to practice on, and it's getting hard for me to come up with new ideas for my practice pieces.
Most of my masterpieces start with a long piece of tubing, and I make little cuts to add to it. So, I guess I'm a "porcupine" artist. I would imagine beginning welders would probably have tons of this junk laying around... Perhaps I'm in good company.
So, here are the latest:
Never mind the messy workbench... This one started off as your basic helicopter-shaped thing, then more and more pieces got added. The small pieces were mitered (or "fish-mouthed") so they'd butt up against the main tube. Some of these were mitered by hand with a file, and some were sanded with a drum sander attached to a drill press... (?!?!) -See next post...
another view...
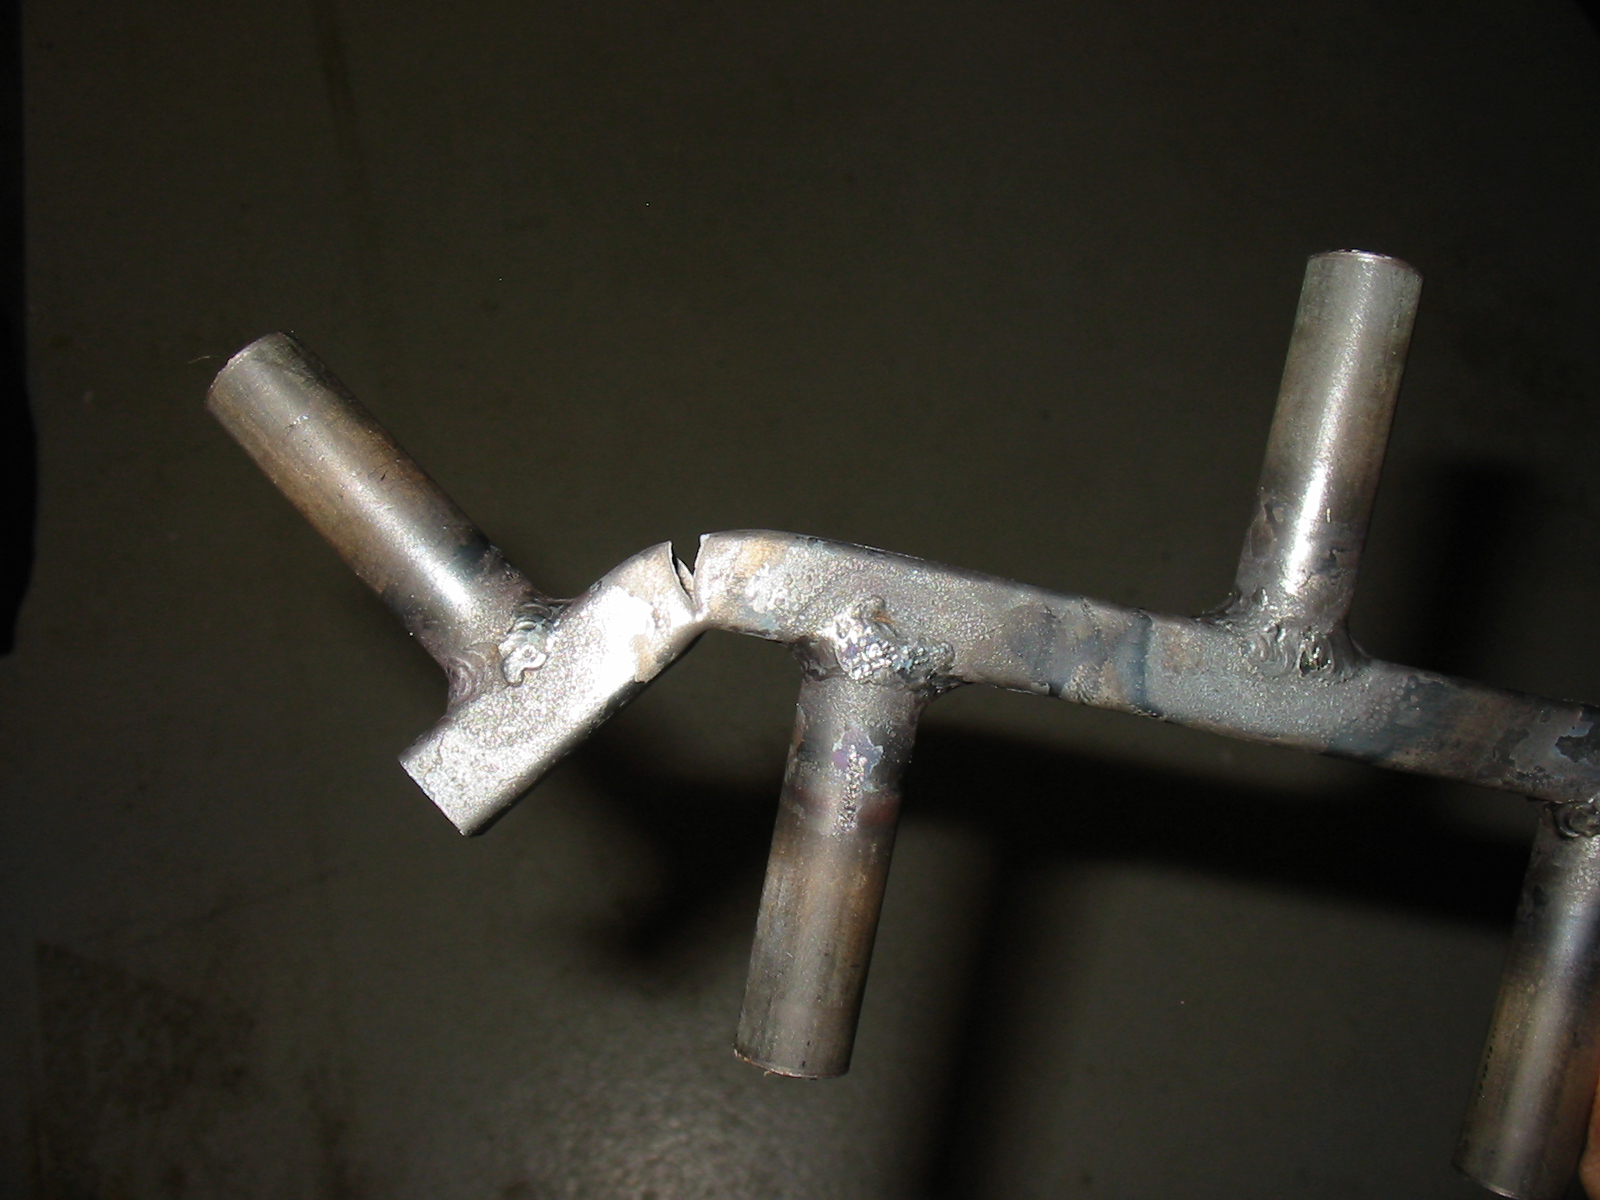
This one was a strength test. Seems my welds are strong enough yes?
This my latest piece. It's kind of like a "jack" if you remember those... But this was all mitered tubing.
So, I'm just trying to use up my box of practice pieces.
All of what you see here is for sale, if you're looking for some art for your home.
Please get in touch with me if you see anything you like.
Stay tuned...
Sorry if it's a little boring to watch, but it's all I've been doing lately. I ordered that box of 4130 cut offs to practice on, and it's getting hard for me to come up with new ideas for my practice pieces.
Most of my masterpieces start with a long piece of tubing, and I make little cuts to add to it. So, I guess I'm a "porcupine" artist. I would imagine beginning welders would probably have tons of this junk laying around... Perhaps I'm in good company.
So, here are the latest:
Never mind the messy workbench... This one started off as your basic helicopter-shaped thing, then more and more pieces got added. The small pieces were mitered (or "fish-mouthed") so they'd butt up against the main tube. Some of these were mitered by hand with a file, and some were sanded with a drum sander attached to a drill press... (?!?!) -See next post...
another view...
This one was a strength test. Seems my welds are strong enough yes?
This my latest piece. It's kind of like a "jack" if you remember those... But this was all mitered tubing.
So, I'm just trying to use up my box of practice pieces.
All of what you see here is for sale, if you're looking for some art for your home.
Please get in touch with me if you see anything you like.
Stay tuned...
Tuesday, July 19, 2011
Ok, how about a post that's NOT welding?
You asked, I listened.
I get thousands of emails every day asking for more motorcycle-progress pics.
I can see how the welding stuff may be a little boring for some of you...
One of my first "real" welding projects was to build an "engine cradle." -That's what I call it anyway...
I built this so I could position the engine exactly where it needs to be in relation to the frame. The sprockets are perfectly lined up, the engine is level, and centered. The 3 bolts are to make fine adjustments. I think it may have to move toward the front wheel slightly, but from side to side, it's right on.
All you sharp-eyed viewers will notice 2 things... One, that's a HUGE counter-shaft sprocket on that thing! Yes, and it's custom. PBI made it, and it's really 18 tooth. There is a matching 42 tooth on the rear that a company called "Rebel Gears" made me. I had to go custom on the sprockets because of the rear hub/wheel combo. I'm using dirt bike wheel parts, and dirt bikes use very large rear sprockets. Plus, the fact that the rear wheel is 21 inch (!!) that plays a part also. SO, in order for me to get back in the ball park with the final drive ratio, I had to come up with a front/rear sprocket combo that would do that. The SMALLEST rear sprocket I can get is a 42 tooth. (without machining away some of the bolt shoulders in the hub... and I didn't want to do that) So in order to be somewhat close to the stock gearing, I needed an 18 tooth front. -Rebel gears again. They hooked up the PBI.
The second thing to notice in the photo is the nice, shiny silver patch on the case below the sprocket. This is what raw aluminum looks like. I'm glad to know that the brown, "gas stained" clear coat will come off with a little paint stripper and elbow grease.
So, now we're looking like this:
The drawing on the wall behind the bike is new as well... It keeps morphing into more detail, but I think I'm set on the final design/measurements. I have the "plates" that will bolt the engine to the frame tubes drawn out and those will be made out of aluminum... .375" for the rear plates and .25" for the front/top. I may have a lead on a guy here in town with a laser cutting machine, but if he doesn't work out, there's a water-jet company in Cali with no minimum charge on cutting. Hopefully I can keep it all as local as I can.
So what's next? Probably ordering my frame tube steel, and I think ol' Santy may come a little early this year... One of the little elves mentioned something about a drill press with a cross-slide vise. That would be about as close to a milling machine as I'd ever get, and a VERY nice Christmas present.
As usual, if you can hang on, I'll have more...
I promise.
I get thousands of emails every day asking for more motorcycle-progress pics.
I can see how the welding stuff may be a little boring for some of you...
One of my first "real" welding projects was to build an "engine cradle." -That's what I call it anyway...
I built this so I could position the engine exactly where it needs to be in relation to the frame. The sprockets are perfectly lined up, the engine is level, and centered. The 3 bolts are to make fine adjustments. I think it may have to move toward the front wheel slightly, but from side to side, it's right on.
All you sharp-eyed viewers will notice 2 things... One, that's a HUGE counter-shaft sprocket on that thing! Yes, and it's custom. PBI made it, and it's really 18 tooth. There is a matching 42 tooth on the rear that a company called "Rebel Gears" made me. I had to go custom on the sprockets because of the rear hub/wheel combo. I'm using dirt bike wheel parts, and dirt bikes use very large rear sprockets. Plus, the fact that the rear wheel is 21 inch (!!) that plays a part also. SO, in order for me to get back in the ball park with the final drive ratio, I had to come up with a front/rear sprocket combo that would do that. The SMALLEST rear sprocket I can get is a 42 tooth. (without machining away some of the bolt shoulders in the hub... and I didn't want to do that) So in order to be somewhat close to the stock gearing, I needed an 18 tooth front. -Rebel gears again. They hooked up the PBI.
The second thing to notice in the photo is the nice, shiny silver patch on the case below the sprocket. This is what raw aluminum looks like. I'm glad to know that the brown, "gas stained" clear coat will come off with a little paint stripper and elbow grease.
So, now we're looking like this:
The drawing on the wall behind the bike is new as well... It keeps morphing into more detail, but I think I'm set on the final design/measurements. I have the "plates" that will bolt the engine to the frame tubes drawn out and those will be made out of aluminum... .375" for the rear plates and .25" for the front/top. I may have a lead on a guy here in town with a laser cutting machine, but if he doesn't work out, there's a water-jet company in Cali with no minimum charge on cutting. Hopefully I can keep it all as local as I can.
So what's next? Probably ordering my frame tube steel, and I think ol' Santy may come a little early this year... One of the little elves mentioned something about a drill press with a cross-slide vise. That would be about as close to a milling machine as I'd ever get, and a VERY nice Christmas present.
As usual, if you can hang on, I'll have more...
I promise.
Dang...
It's been almost 3 months since I last posted anything. Sorry to the faithful few who sometimes check this blog.
Much has happened though... I was able to meet with "Jim" the technical counselor from the EAA and it went really well. We pretty much just talked for the first hour. He lives on an airport like some folks live on a golf course. He can literally roll an airplane out his hangar and it's about a 50 yard trip to the runway. I couldn't believe that he actually prepared for my visit by setting up some flat 4130 sheet for me to run a horizontal bead on, and some mitered (super-thin) tubing to tack and join too. I had never worked with .020 tubing before. That was hard. But by the end of my visit, I was told that I was doing just fine... I just needed some "seat-time." -Practice... that is.
Airplane guys are just cool.
Here are some of my awesome sculptures:
This thing was pretty crazy. It started off as a couple pieces, but then I couldn't think of anything creative to do with it so I just kept adding new strips. There wasn't too much thought into this thing, it's just taken a life of it's own. I'm sure all beginning welders have this kind of stuff littering their workbenches...
This was my first attempt at brazing. I was at AutoZone and I found some $4 brazing rod. I'm sure it's junk, and all they tell you is that it's "phosphor bronze" rod. Yes, I know I over-heated it, Yes, I know it boiled, Yes, it's ugly, but see those bends? I COULD NOT break this thing. I went back and forth in the vise with a hammer, and it's still holding. I can assure you that I have gotten a little better at my brazing and heat control since this little experiment...
I bought a box of 4130 cut-offs from a company called "Aircraft Spruce." They sell a welder's kit for about $27. It came with a bunch of different diameters/wall thickness/shapes of tubing. Some of it was just cool. I LOVE aero tubing.
So, I started in on this stuff. There was a 1 inch diameter .090 wall thickness tube that I drilled .5 inch holes in. Then I inserted small lengths of .5 inch .083 wall tubes thru the big tube and welded them in... like this:
This is one of the better examples:
And for the last one, I did a little "fillet braze" joint. Bicycle builders beware...
I've probably tried every welding tip and gas pressure combination I can think of and for most of the good welds (in my .060 tubing) I've decided that my #0 tip at 5psi works the best. With the 1 or 2 tip I'm not flowing enough gas and I get torch pop. With the #0, It's kinda hissy with the gas turned up to melt the .060 steel, but I seem to have much better results. Perhaps that will change with more experience, but for now I think I may be ready to start tackling some of my actual frame.
The plan is to start with the main frame tube that goes from the back of the engine up towards the seat. Then the top tube connecting to the head, then the down tube from the head to the front of the engine.
-But, I'm not rushing this. These are the important tubes!
Thanks for looking! More to come...
Much has happened though... I was able to meet with "Jim" the technical counselor from the EAA and it went really well. We pretty much just talked for the first hour. He lives on an airport like some folks live on a golf course. He can literally roll an airplane out his hangar and it's about a 50 yard trip to the runway. I couldn't believe that he actually prepared for my visit by setting up some flat 4130 sheet for me to run a horizontal bead on, and some mitered (super-thin) tubing to tack and join too. I had never worked with .020 tubing before. That was hard. But by the end of my visit, I was told that I was doing just fine... I just needed some "seat-time." -Practice... that is.
Airplane guys are just cool.
Here are some of my awesome sculptures:
This thing was pretty crazy. It started off as a couple pieces, but then I couldn't think of anything creative to do with it so I just kept adding new strips. There wasn't too much thought into this thing, it's just taken a life of it's own. I'm sure all beginning welders have this kind of stuff littering their workbenches...
This was my first attempt at brazing. I was at AutoZone and I found some $4 brazing rod. I'm sure it's junk, and all they tell you is that it's "phosphor bronze" rod. Yes, I know I over-heated it, Yes, I know it boiled, Yes, it's ugly, but see those bends? I COULD NOT break this thing. I went back and forth in the vise with a hammer, and it's still holding. I can assure you that I have gotten a little better at my brazing and heat control since this little experiment...
I bought a box of 4130 cut-offs from a company called "Aircraft Spruce." They sell a welder's kit for about $27. It came with a bunch of different diameters/wall thickness/shapes of tubing. Some of it was just cool. I LOVE aero tubing.
So, I started in on this stuff. There was a 1 inch diameter .090 wall thickness tube that I drilled .5 inch holes in. Then I inserted small lengths of .5 inch .083 wall tubes thru the big tube and welded them in... like this:
This is one of the better examples:
And for the last one, I did a little "fillet braze" joint. Bicycle builders beware...
I've probably tried every welding tip and gas pressure combination I can think of and for most of the good welds (in my .060 tubing) I've decided that my #0 tip at 5psi works the best. With the 1 or 2 tip I'm not flowing enough gas and I get torch pop. With the #0, It's kinda hissy with the gas turned up to melt the .060 steel, but I seem to have much better results. Perhaps that will change with more experience, but for now I think I may be ready to start tackling some of my actual frame.
The plan is to start with the main frame tube that goes from the back of the engine up towards the seat. Then the top tube connecting to the head, then the down tube from the head to the front of the engine.
-But, I'm not rushing this. These are the important tubes!
Thanks for looking! More to come...
Thursday, April 28, 2011
The learning curve begins...
Here we are. The beginning of Summer. As you all know by now, my goal this summer is to become a proficient welder (or Weldor as some of my books say...) So, I need an office. A little place to call my own where I can concentrate, study and learn. This is what I came up with...
This little beauty was assembled from scraps of wood found in my basement. It's a 24" square desk topped with ceramic tile... and a brick. Fancy, I know. At least I can sit and brace my elbows on the edge while I figure this all out.
I went to Lowes to get some steel to practice on. I bought a piece that was .125 inches thick by 36 inches long. I've been cutting that into small pieces as needed. I'm not sure why I bought .125 though... I probably should be focusing on some thinner material, but it's what I have now, and I'll certainly ruin it... or practice, I mean.
So here are my first "welds"...
The lower bead was just that... making a puddle and running it across the steel. That was fun, so I grabbed another piece of steel, put it next to my first piece, tacked it at both ends, then went for it! Nothing like jumping right in! Purdy ain't it? I was so proud... until I put it in my vice and bashed it about 5 times with a hammer. Broke right off. Seems I only penetrated about a third into the steel. So I tried it again, same 2 pieces, re-welded. This time I made sure I had good penetration and when I did my destructo-test, I passed. Bent the steel in half about a half inch below the weld. I win!
So now you see how cocky I am! I tried various other joints... outside corner weld... (perfect)
and a (kind-of) "T-weld" (not so perfect... lots of undercutting and very "blobby")
So, as you can see, I need lots of practice. I've read about everything I can find on "gas welding" and watched a few DVD's, but there's nothing like doing it yourself... and seeing where you're deficient. I keep going back and referencing various things like torch settings, distance and angle of the flame to the steel, how clean the material is, etc. My issue now is that I don't want to develop any bad habits. So, why don't I enroll at the local community college and take a course? Because they don't offer oxy-acetylene welding. It's all electric... stick, arc, Mig, Tig. No gas or brazing/soldering. Bummer.
I just said to Deb last night "I need to find someone to look over my shoulder to make sure I'm not doing things really wrong... kind of like an instructor."
If I were Mig-ing or Tig-ing that is real easy... Gas welding, however is another story. It's like this "romantic" way of welding. It began in the early 1900's and leather-clad men would wield torches and wear heavy gloves and goggles to fuse steel together with fire! By WWII, they came up with Tig welding which was the same but used electricity and an arc instead of fire (which sped up production on the military assembly lines) Mig took over as a "low cost" alternative and the old romantic method of welding with fire has taken a back seat.
However...
The aircraft industry STILL gas welds. Even as late as 1990 some aircraft companies were still gas welding aluminum. Some still do today. Even the EAA (experimental aircraft assoc.) officially endorses gas welding and if you go to the Osh Kosh fly in you can attend a gas welding seminar.
So, in looking for my "instructor", I went to the EAA. Turns out there's a guy in the next town who is an EAA technical counselor. His job is to make sure that every home-builder has an airplane that passes it's technical certification. So we get in touch, and he's willing to teach this dude how to gas weld!
Pretty awesome.
I'm humbled, yet giddy as a little school girl at how all this motorcycle stuff seems to be coming together.
Thanks for reading, and I'll try to keep the posts up.
This little beauty was assembled from scraps of wood found in my basement. It's a 24" square desk topped with ceramic tile... and a brick. Fancy, I know. At least I can sit and brace my elbows on the edge while I figure this all out.
I went to Lowes to get some steel to practice on. I bought a piece that was .125 inches thick by 36 inches long. I've been cutting that into small pieces as needed. I'm not sure why I bought .125 though... I probably should be focusing on some thinner material, but it's what I have now, and I'll certainly ruin it... or practice, I mean.
So here are my first "welds"...
The lower bead was just that... making a puddle and running it across the steel. That was fun, so I grabbed another piece of steel, put it next to my first piece, tacked it at both ends, then went for it! Nothing like jumping right in! Purdy ain't it? I was so proud... until I put it in my vice and bashed it about 5 times with a hammer. Broke right off. Seems I only penetrated about a third into the steel. So I tried it again, same 2 pieces, re-welded. This time I made sure I had good penetration and when I did my destructo-test, I passed. Bent the steel in half about a half inch below the weld. I win!
So now you see how cocky I am! I tried various other joints... outside corner weld... (perfect)
and a (kind-of) "T-weld" (not so perfect... lots of undercutting and very "blobby")
So, as you can see, I need lots of practice. I've read about everything I can find on "gas welding" and watched a few DVD's, but there's nothing like doing it yourself... and seeing where you're deficient. I keep going back and referencing various things like torch settings, distance and angle of the flame to the steel, how clean the material is, etc. My issue now is that I don't want to develop any bad habits. So, why don't I enroll at the local community college and take a course? Because they don't offer oxy-acetylene welding. It's all electric... stick, arc, Mig, Tig. No gas or brazing/soldering. Bummer.
I just said to Deb last night "I need to find someone to look over my shoulder to make sure I'm not doing things really wrong... kind of like an instructor."
If I were Mig-ing or Tig-ing that is real easy... Gas welding, however is another story. It's like this "romantic" way of welding. It began in the early 1900's and leather-clad men would wield torches and wear heavy gloves and goggles to fuse steel together with fire! By WWII, they came up with Tig welding which was the same but used electricity and an arc instead of fire (which sped up production on the military assembly lines) Mig took over as a "low cost" alternative and the old romantic method of welding with fire has taken a back seat.
However...
The aircraft industry STILL gas welds. Even as late as 1990 some aircraft companies were still gas welding aluminum. Some still do today. Even the EAA (experimental aircraft assoc.) officially endorses gas welding and if you go to the Osh Kosh fly in you can attend a gas welding seminar.
So, in looking for my "instructor", I went to the EAA. Turns out there's a guy in the next town who is an EAA technical counselor. His job is to make sure that every home-builder has an airplane that passes it's technical certification. So we get in touch, and he's willing to teach this dude how to gas weld!
Pretty awesome.
I'm humbled, yet giddy as a little school girl at how all this motorcycle stuff seems to be coming together.
Thanks for reading, and I'll try to keep the posts up.
Friday, April 8, 2011
I'm Rollin'!
So, I told you I'd explain about the local shop lacing my front wheel...
I'm all for supporting local businesses, but it seems for me that I always have to go elsewhere to get good service.
I gave a hub, complete set of spokes and a rim to a local shop (who will remain nameless) just to put back together. After a week, he still couldn't figure it out so I went and picked it up. Only to see all the scratches he put in my freshly painted black rim. I was mad.
So, I boxed up and sent the parts off to Buchanan's again. They charged twice what the local place charged, but at least they did it. I have to say, I'd rather have my body riding on some quality wheel-smithing rather than something a shoddy local shop put together... or didn't. It was a blessing in disguise.
Anyway, the drama is over, and now we have...
Yep, mounted to the table, exactly the wheelbase I want ready to have some frame tubes connected.
Actually the next step is to build/weld an engine cradle that will hold the engine in the correct position, bolt that to the table, then really start bending/connecting frame tubes.
I just got 3 welding tips, so that journey begins now. I'm finally finished with goal #2. Goal #3 is the welding and I'm really excited!
How 'bout 1 more...
More updates to come...
I'm all for supporting local businesses, but it seems for me that I always have to go elsewhere to get good service.
I gave a hub, complete set of spokes and a rim to a local shop (who will remain nameless) just to put back together. After a week, he still couldn't figure it out so I went and picked it up. Only to see all the scratches he put in my freshly painted black rim. I was mad.
So, I boxed up and sent the parts off to Buchanan's again. They charged twice what the local place charged, but at least they did it. I have to say, I'd rather have my body riding on some quality wheel-smithing rather than something a shoddy local shop put together... or didn't. It was a blessing in disguise.
Anyway, the drama is over, and now we have...
Yep, mounted to the table, exactly the wheelbase I want ready to have some frame tubes connected.
Actually the next step is to build/weld an engine cradle that will hold the engine in the correct position, bolt that to the table, then really start bending/connecting frame tubes.
I just got 3 welding tips, so that journey begins now. I'm finally finished with goal #2. Goal #3 is the welding and I'm really excited!
How 'bout 1 more...
More updates to come...
Subscribe to:
Posts (Atom)